Wednesday, April 28, 2010

ponies, bubble baths & umbrellas

I have a few layouts to share from the weekend.  Between Cocoa Daisy's Spring Crop and the April challenges at Scrapbook Heaven, I had more inspiration and *assignments* than I could handle.  Love using challenges to give my creating a kick in the pants.

This one was for Mou Saha's challenge to use butterflies.  I splattered paint (always an adventure--I place my page in the bathtub and splatter away!), and hand-stitched a flight path for the butterfly.
Paper: My Mind's Eye; butterfly cut with ecraft; Letters: Thickers by American Crafts and My Little Shoebox
This LO was for a sketch challenge that was part of the Cocoa Daisy crop.  I adore these little banners--I know they are super trendy right now, but I'm okay with that b/c they are so darn cute!
Paper: My Mind's Eye: Bloom and Grow (so in love with that line!)
I hand cut the title and filled the negative with little spots of color (another trend).  The banner and frame are machine stitched.

And one more: this one's for Holly's challenge at SH to stamp on your background.  I used jumbo bubble wrap and acrylic paint to create the large circles.
Paper: My Mind's Eye and Stampin Up! (clouds and BG); Stickers: AC Thickers (adore these); Rubons: AC; snaps: Making Memories; acrylic paint, gesso; photo corner punch: Stampin Up!; black thread
That about does it for layouts.  I have one more thing to show you.  This one I did not make; I found it in my mailbox on Monday:
How cute is that!  It's a little spiral bound journal and it was created by Melissa at Crab Apple Designs (and her business card is the most adorable card I've ever seen).  Melissa laminates the covers of her journals and includes an adorable pocket page in the front.  The book is filled with quality blank paper just waiting for oodles of doodles, sketches, and ideas.  If you need a new journal, go visit Melissa!

Friday, April 23, 2010

A darn near perfect day

Today was good, well, great really.  Just the kind of day I needed (I get grouchy when I don't accomplish anything creative for a few days).  Lots of time to create--3 LO's and a card (and a goofy name tag, if that counts!).   All thanks to hubby taking the day off.  Hubby's day off = my day off!  Not sure if he sees it that way, but I do.

The flowers are cut from MME paper (minus the upper right one) using the Craftwell eCraft

papers and chipboard accents: Scenic Route, "treats" letters: Craftwell eCraft; buttons: fancy pants? (that's what you get for throwing out the packaging when you reorg!)

paper: DCWV; Thickers: AC; chipboard T (cause I didn't have enough t's in the Thickers): Heidi Swapp; twine: SU!

These projects were inspired by challenges going on through the end of April over at Scrapbook Heaven.   If you haven't stopped by Scrapbook Heaven, check it out--lots of inspiration to help you jump start your pages.  And coming up in May they'll be having a  Flower Power event--I'm very excited for this one!  I'll be posting more deets soon.  Register on the forum now so you'll be good to go in May!

I'll post the third LO tomorrow when I can snap a daylight pic of it.  Hope you have something creative planned for the weekend!

Thursday, April 22, 2010

And the winner is...

random.com chose lucky #19: Marie Sierra as the winner of the handmade flowers smorgasbord.  Thank you all so much for the super nice comments on my project.  Please let me know if you make a journal with your jeans--I'd love to see it!  Marie, send me your addy and I'll get your package in the mail to you.

Tuesday, April 20, 2010

Giveaway Reminder

Crochet Rose Pattern from Lolly Chops
Don't forget: you have until tomorrow night to leave a comment here to be entered to win some homemade flowers.  Don't be shy--throw your name into the hat!  The above is a peaky at one of the flowers that will be in the giveaway grab bag.  And if you haven't had a chance to hop the blogs, be sure to check them out--there are some fab projects and fun prizes to win!  I'll post the winners here on Thursday.

Monday, April 19, 2010

Office Supplies: Method Playground

This week on the Playground we're raiding our desk drawers for embellishments.  The challenge is to use office supplies on your projects.
Making the page a first day of school LO was a no-brainer.  I started the process by gathering supplies: manilla folder, graph paper, stapler, paper clips, a mini binder clip, shipping tag, some sticky labels, metal rimmed tag, and an index card.  Then I pulled out some office-y scrapbooking supplies: alpha stickers, alpha ribbon and a second coordinating ribbon, and a library card stamp, and a spiral edge punch.  After choosing, editing, and resizing my photos (2- 2x2's, 2x3, 3x4, and 3 1/2x5), the page just built itself.  The hardest part was finding the darn notebook where I had jotted down the conversation I had with Camden when he came home from his first day of first grade.  It's written on the index card and reads:
me: Tell me about your day!? 
you: One thing.  I hated it. 
me: Why?? 
you: Because I miss you.  I think about you and I miss you.  It was such a long day and they worked my butt off!

Saturday, April 17, 2010

spring in my step: a blog hop {with giveaways!}

Thank you Pinterest for making this one of my most viewed posts!  If you like crafty tutorials, be sure to check out my other fun projects linked above.

I am so thrilled to be a part of  Scrapbook Heaven's first ever blog hop (and it happens to be my first blog hop, too)!  Thanks so much for joining us!

If you're popping by here and didn't know the fun that's going on, please go back to Scrapbook Heaven to get all the deets for the Hop. Our members have some wonderful inspiration to share with you..... and also, some great prizes.

The theme for the Hop is "Spring in my Step". We'll be sharing a variety of Spring-y projects with you.

So here's mine: 
A *green* journal.

There's lots of recycling packed into this little book. Let's get started, shall we?
Rescue a pair of poor, ripped, never-to-be-worn-again jeans from the trash
and cut yourself a leg and a pocket.
Prepare your materials:
2 pieces of denim and chip board (I used the backing of last year's blotter calendar) cut to the same size
Patterned paper scraps cut 1/2-3/4" larger than the chipboard
A flower embellishment (mine is made from used dryer sheets--more on that later)

Cover one side of the chipboard with patterned paper. 
Make mitered corners by snipping the corners off the paper to a spot equal to the thickness of the chipboard.  Glue and fold over edges.
This is about the spot in the tutorial that I got a bit excited about the project and completely stopped taking pictures.  Sorry about that, but I know you'll get it without  the visuals, so here we go.

I kept the hem of the jeans in tact on one side, and sewed the other three sides on both pieces.  I didn't bother turning the fabric under, but just sewed close to the edge to keep fraying under control.  If those little stray pieces bother you, then be sure to add a seam allowance when you cut your denim. 

Now stitch the pocket to the denim on three sides twice around.  And add your little flower embellie. Oh, here's how you make the one I used.  Cut a used dryer sheet into four different sized circles (they don't need to be perfect), or use the Sizzix Circles die.  Add color to the circles by misting them with ink.  Layer the circles from largest to smallest and stitch a button to the center.

Glue the pocket-embellished-denim to the front cover, and the plain denim to the back.  Cut bunches of scrap paper to size to use as your journal pages.  I used leftover paper from a nearly used up spiral notebook, some solid cardstock scraps, and some copy paper.  I also like to add some little page protectors to my journals to add bits of this and that.  Bind it all together with a binding machine, or use the Crop-a-Dile to punch holes and secure with rings or tied ribbon.  Add a bit of ribbon to the binding, and some pens in the pocket.


And there you have it, a recycled journal complete with on-board pen holder.

Thanks so much for hanging in there through all those directions.  Our blog hop runs from today, April 17th until April 20th. Invite your friends to play along! We'll be drawing for prizes on Wednesday, the 21st.  Leave a comment here before the 21st for a chance to win an assortment of handmade flower embellies. 

{Note: these images are the result of my own work, and are copyrighted by me under content of my blog.  If you would like to share this project on your site, please use only one photo and include a link back to this page.  Thank you!}

Wednesday, April 14, 2010

Moments

I was looking through some photos of the boys as babies last night, and got a little weepy and nostalgic.  As hard as those baby days were, and as happy as I am that we are through that stage in our lives, somehow makes me feel so sad that they are over.  It's another one of those crazy things about life: when you're in it, you sometimes wonder if and how you'll survive. And then when you make it through, a piece of you wishes it wasn't over (kind of like college, come to think of it!).


Journaling reads:  My heart feels heavy when I look at this photo, aching for the soft, sweet baby-ness. People say to cherish these baby days, even though they are some of the most difficult days of your life. But I don’t think I cherished them enough. I tried to hold onto the moments: the softness of baby hair against my cheek, the snuggly warmth of a tiny body against my chest, the sweet warm breath against my neck, but they still slipped by me. Do I recall the very last time a baby fell asleep in my arms? The very last time I nursed? The very last diaper I ever changed? No, I don’t. And that reality makes me hurt, the deep kind of hurt that seizes my chest and makes me weep. I’ll never get these days back, these sweet, soft baby days.

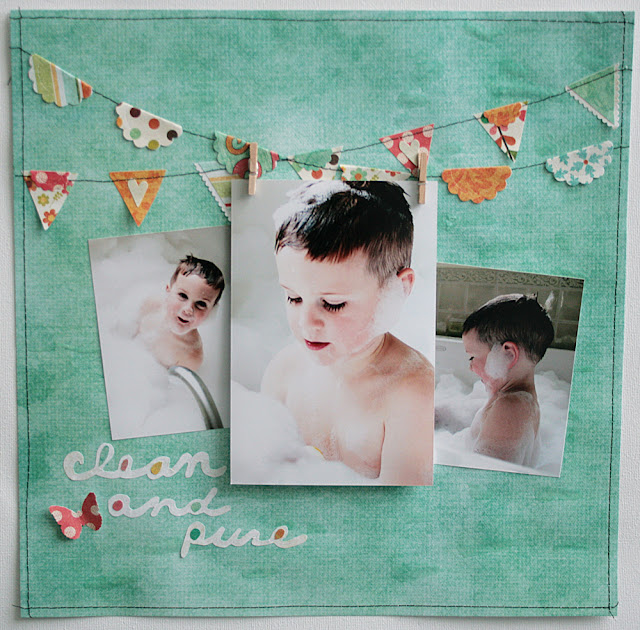
All products My Little Shoebox, except BG paper (DCWV), clock (Heidi Swapp), rick-rack (Wrights) & lace trim (unknown).

Monday, April 12, 2010

Organizing yarn

I used an old wine rack to organize my small (but growing) collection of yarn.  This sits on a table in our bedroom because I am flat out of space in the stUDio.  Then today I came across this brilliant storage idea linked from One Pretty Thing.  I love the clean lines this creates, and that it is *green*. I'll be looking at round containers of all sizes with new eyes (like the evergrowing collection of white plastic frosting containers from all the cupcakes we've been eating).  Lots of possibilities!

Sunday, April 11, 2010

Spring has Sprung

It has been a productive scrappy weekend thanks to the team at Scrapbook Heaven and their fabulous challenges.  Here's another LO for Susan's critter challenge.

cardstock and patterned paper: DCWV; white alphabet stickers: Sassafras; green letters: Sizzix:Naturally Serif; epoxy chipboard bird: Colorbok; tree diecut with Craftwell eCraft; crochet flower: me!

Saturday, April 10, 2010

You are Amazing

Another sketch from Scrapbook Heaven.
I loved this sketch right away, and had the perfect photo in my stash of film pictures. 
Pom-pom fringe is a bit like Midas: everything it touches just turns to gold (or at least looks a whole lot more fun!).  I got a little silly with the black pen and added some crazy doodling.  I'm such a doodle wanna be!  I really want to be a good doodler, but sometimes I just can't pull it off.  {sigh}


patterned papers: My Mind's Eye; journaling block, circle, and word stickers: Colorbok; star button: Buttons Galore; fabric yo-yo: Fabric Editions, LLC; ric-rac: Wrights, pom-pom fringe: unknown
The star was cut with Craftwell's eCraft machine.

Friday, April 9, 2010

Li'l Buckaroo

I landed on Scrapbook Heaven, a forum and kit club, the other night.  They have a fantastic Design Team, and lots of activity in their forum with fun shallenges and sketches. I came in on the tail end of a sketch challenge that ends today, but I did manage one quick LO thanks to a very cooperative little boy who busied himself with a pile of dry beans and some 'guys'!

Here's the sketch, courtsey of Marcia at Scrapbook Heaven
Simple: one photo, a bit of story, and some paper.

And there's the flower!
Of course, I had to get some kind of 'flower' on this totally all boy page, and since silk or crochet would not have fit the theme, an accordian paper one would have to do the trick!

Thursday, April 8, 2010

Watch Me Grow mini/DVD holder

How totally cute are these My Little Shoebox papers?!  They are so sweet and girly, and perfect for a new little someone.  The book is designed to hold a few photos (in the mat on the front, and on the inside flaps), and a DVD of photos or video of baby's first year in the center opening.  You could also create additional pages to attach to the center to hold more photos and memorabilia.  The idea came from Mini-Books by Roxi Phillips.


Tuesday, April 6, 2010

Furry Crochet Owl

I found this blog the other night while searching for crochet patterns on Ravelry.  She has this fabulous technique of brushing the crochet to make it furry.  Do check out her adorable creations--the squirrel and pomeranian are two of my faves.  Anyway, I used her quickie owl pattern and tried the technique out.  So much fun!  First, the owl crocheted up in a flash.  I used a chunky weight wool-blend yarn and a large hook.  I didn't have exactly the right dog brush that she uses, but my cat brush did a decent job.   
I love the way the furry bits make great ear tufts!  Ahhh, just another one of the great possibilities for crochet!

Monday, April 5, 2010

Method Playground: Flowers! {eta video tute!}

Spring has sprung at the Playground, and flowers are blooming all over our projects.
I created a pretty little bloom from a remnant of lacey crochet and a scrap of patterned paper.  Here's how:
Cut a length of lace (10-12") and fold in half down the length.

Join the two ends together and stitch (I used my machine for this).

Turn the circle inside out so the ends are on the inside of the ring as shown.

Thread a needle and knot the end.  Beginning at the seam you created, use a running stitch and stitch along the folded edge of the lace pulling tightly into a gather as you go.

Pull tightly into a gathered bunch and knot by tying the beginning and ending threads together tightly. 

Flatten the circle and voila! A beautiful ruffled circle to attach to your next project.
I'm going to try a quick video tute on the paper roses, and if it works out, I will post a link here.  Crossing fingers!
Be sure to check out the DT's amazing creations for lots more inspiration, and then get some flowers blooming on your projects!  Have fun!!