Sunday, January 30, 2011

February Sneak Peeks


Can you believe that January has already flown by?!  A new month means new kits at Scrapbook Heaven.  

Look at these yummy-licious kits: 
 Here's my hodgepodge of sneaks:


I'll be back on the first with the full reveal.  Thanks so much for stopping by!

Wednesday, January 26, 2011

Mermaid Stair Step

I've been working on some invites for a little cutie's first birthday.  Her theme is Mermaids.  I used these super cute mermaids I found in Woofy World's etsy shop.  Are those not the sweetest!?  This card is a stair step design--I love the dimension this style provides.


You can find directions for these all over the internet, and then just tweak the measurements to suit your needs.  Here are the measurements I used to fit in a standard card envie:
  1. Cut base to 4" x 12"
  2. Score at 1-1/4", 2-1/2", 4-1/2", 6 1/2", and 9-1/4".
  3. Alternately fold mountains and valleys.
  4. Embellish!
Here's a view from above so you can see the layers:
And because I couldn't stop myself from taking pics of this mermaid, here's a few more:


And the envelope seal:

Tuesday, January 18, 2011

Totally unrelated, but fun nonetheless!

I have a new love: my iPod touch 4.  I can update my blogs from my bed before I fall asleep at night, or check my mail before I even get out of bed in the morning.  I can play mindless games when I am procrastinating a task, and I can download crochet patterns and keep track of my rows of stitches.  And best of all I can take photos on the fly without lugging around my DSLR camera.

One of the first apps I downloaded was Instagram
It's free and it's super fun.  Snap a photo, process it with one of Instagram ultra hip and super cool filters, and then send it out into the world for all to see.

Here are some of my photos processed with Instagram:

A self portrait
Today's snow day breakfast

The view from our back door during today's snow
Isn't that fun?  I want to Instagram all my photos.  It makes Photo-a-Day or 365 Days funky and even more fun and artistic.  Instagram creators, you're genius!

Thursday, January 13, 2011

Photo Carousel

I'm back to share the photo carousel I made for the web show this past weekend.  There were some technical difficulties with the recording, so I don't have a link to the show for you.  However, I do have some photos of the finished project with some deets on how I plan to use this little diddy this year.  Here we go!

This project was created almost exclusively with the contents of this kit from Scrapbook Heaven:
There are still a few left in the store, and at $29.99, it is a great deal.  I still have papers and lots of ribbon left over.

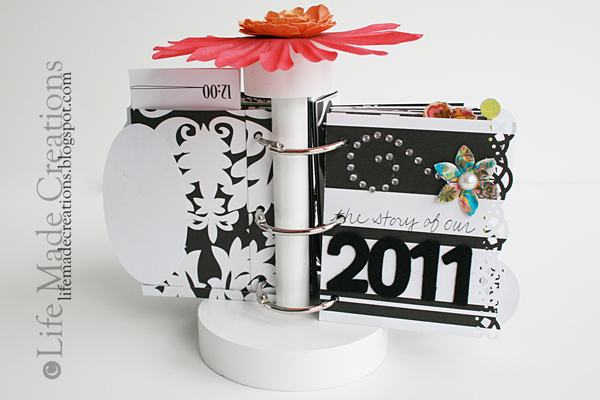
We start off with the wooden ribbon spool holder from Prima and some binder rings from the office supply store.  The ones I used are 1 1/2" in diameter and allow for plenty of space to add pages throughout the year.


I designed this project to hold favorite photos of 2011 and to record special moments of the year.  


So I started off creating divider pages for each month of the year:
 
Just typed up the months on the 'puter and punched them with a variety of punches = super easy tabs.  The numbers are punched from a clock die cut included in the kit.

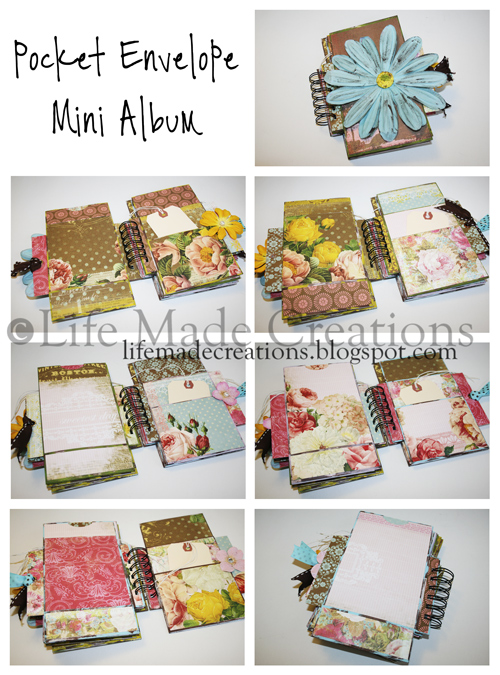
Close-ups of the divider pages:
I did add a couple of flowers from my stash (6, 9, 12 above), but the kit comes with some fab patterned flowers (like 1 and 11), and some die cut flowers so you can create your own paper flowers (seen in 3, 5 and 10).  The butterfly and border punches are Martha Stewart. And for some reason the polka-dot ribbon is photographing red; it's actually hot pink.  Okie dokie, moving on...

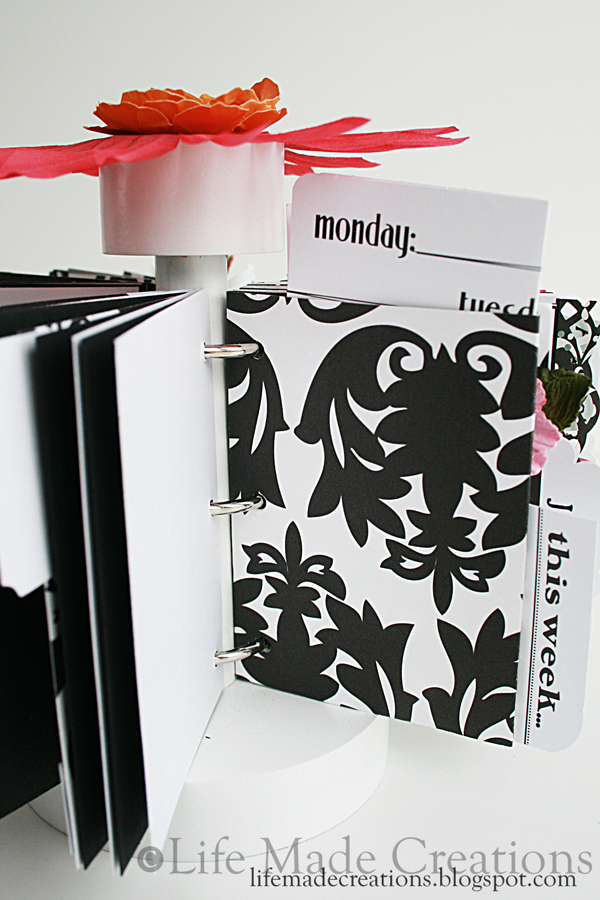
I used some of the patterned paper to cut pages for the album.  All of the pages measure 3 3/4" tall so that they clear the top knob of the carousel.  And most of the pages are 2 3/4" wide, not counting the tabs.  But a few of the pages I extended to 3 1/4" and border punched (like the one above).  I really like how there's a lot of variety peeking out from the edge of the album as it spins.  

Am I boring you to tears yet?!

One of my favorite things in this kit is a sheet of KI Memories die cut paper.  I chopped up this 12x12 sheet and spray glued it to acrylic packaging (any kind of thick, flat acrylic packaging that everything seems to be wrapped in these days)  cut to 2 3/4" x 3 3/4".  In retrospect, I wish I had cut these a little wider so they could peek out too.  

We're almost done, just one more part.


Since not everything throughout the year will fit so neat and tidy on these small pages, I decided to make some pocket pages.  These are super easy:
  1. Cut paper to 4" tall x 6" long.
  2. Score along the 6" side at 1/4"
  3. Make two scores going the short way at 1/2" and 3 1/4"
  4. OK, here's where I think I should have taken some pics of the process: cut away two of the bottom flaps (the tiny 1/2" by 1/4" one and the second long one--1/4" by 2 3/4".
  5. Punch a notch in the top center of one of the sections (this is purely optional, but take it from me: do this before you adhere)
  6. Adhere with the flaps on the inside (I just like the nice finished look this gives).  
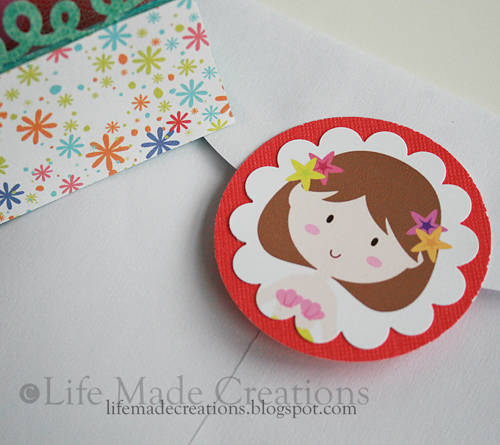
The kit comes with some fun punch out labels and tags like the one shown above.  I used these like tabs on the pocket pages, and will use these for mini versions of "day-in-the-life" "week-in-the-life" projects.

Whew, I'm done!  Thanks for sticking through this project to the end with me.  Oh wait, one more thing, geesh.

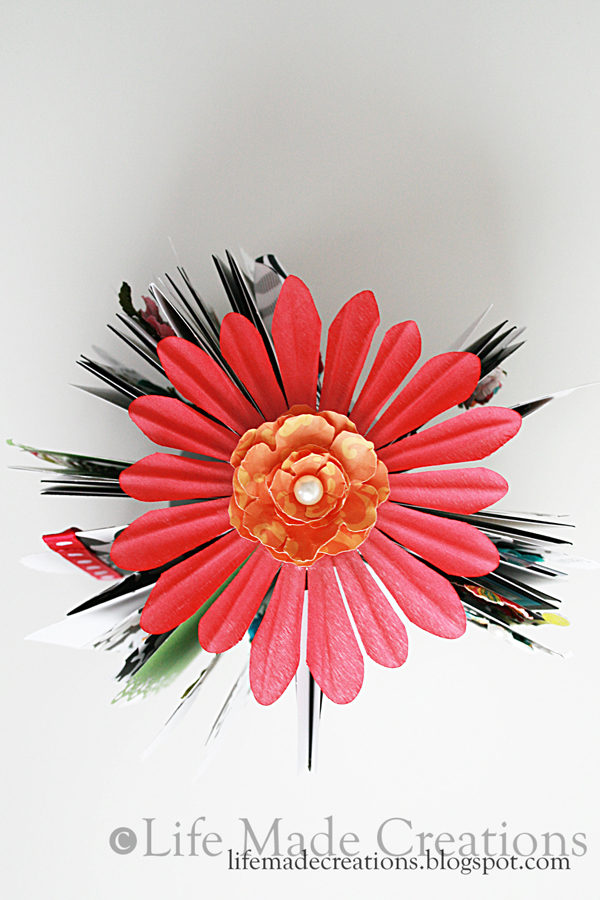
Top the whole thing off with the ginormous fabric flower included in the kit and embellish it with a handmade paper flower.
 Isn't that purty?!


Thanks again for reading, and who knows, maybe I'll be sharing some shots of this project as the year goes on.

Happy Creating!

Art Journal Week One

I have not forgotten about this project, I just haven't worked out a way to fit it into my schedule.  It's like anything else: exercise, quality time with the hubby, reading a good book; creative time has to be worked into the schedule.  I'm pretty settled on the idea that I'll create a page for my art journal every week.  I may be able to create that page in one sitting, or it may take me all week to get 'er done, but I think one a week is an admirable and achievable goal. 


Here's my page from week one:
It's a page from Jessica Sprague's Inspiration Everywhere class.  The bottom portion of the page is a booklet that opens to hold a list of my New Year's resolutions.  I'll keep adding to this list throughout the month, and heck maybe I'll keep it ongoing throughout the year.  Who says resolutions have to just be for New Years?!

Friday, January 7, 2011

Scrapbook YOU!

There are so many gorgeous papers on the market right now, papers with stitching, glitter, flock, embossed texture.  Sometimes it's hard to cut into these beautiful sheets; we think, oh I have to wait for just the right photos for that, or I need to wait to be really inspired by a fantastic idea to use those.

Well, the time has come!  My challenge to you this month is to cut into your gorgeous papers and create a layout of you.  After all, who better to showcase on some beautiful paper than YOU?!  If you take on this challenge and do some journaling about your thoughts, goals, resolutions, plans for 2011, I will enter you into a drawing for a little RAK from me.  Leave a link to your layout here by the 31st.

Here's my page:

I used this stitched paper from Prima.  
If this is not intimidating to cut into, I don't know what is.  It's gorgeous!


Journaling reads: A new year is a time for reflection, new beginnings, a fresh start.  It's a chance to be the best me I can be, to set goals, to aim high, and to make a plan for action.  Only God knows what this year holds, but I know the future is bright. 1/7/11

This entire page is created with the January Elite kit from Scrapbook Heaven.  If you are looking for ways to challenge your Scrapbooking this month, visit the SH forum or blog.

Sunday, January 2, 2011

Envelope Mini Album Tutorial

Here is the photo tute on how to create the pocket mini album from business sized envies.  I hope you give this a try, and if you do, please link up in the comments so I can come see it!

 One:
 Just the standard business sized envelope will do.  
I like the self-adhesive ones, so I don't get a paper cut on my tongue :)

Two:

 Three:
 You want the envie open on both ends creating a tube (these will become the pockets).
DO NOT TRIM the third envie to 9" (see next step).

Four:
 This ends up being 4 3/4".  Save the other half for the next page you assemble.

 Five:

Six:

Seven:

Eight:
note: Hold 1/2 envie so that opening is on right.  Apply adhesive to right side and top, bottom, and left leaving a 5/8" margin on the left.  This is where your album's binding will go.

Nine:
Make top and right hand side of each piece flush.  The tab for the binding should stick out on the left.
Ten:
Flip unit created in step 9 over.  Again don't put adhesive on the binding tab.  Glue longer envie (one with 1- 1/2" folded pocket) to this piece making bottom edges flush.

This is what you should have when you are done:
And here are the measurements for cutting the papers to cover the pages:

I cut a little notch out of the top back pocket to access that pocket.

And before I covered the pockets with pretty papers, I did a quick swipe with the paint brush on the edges (or you could ink them).

Here's another look at my finished album:
If you have any questions at all, I am happy to answer them.

Happy creating!

Photo Carousel Class: A Webshow

I am super duper excited to be doing a Web Sshow for Scrapbook Heaven one week from today: Sunday, the 9th at 5:00pm EST. 

Shannon at Scrapbook Heaven put together an amazing Carousel Kit for me to play with.  It is loaded with papers from KI Memories, Tinkering Ink, Pink Paislee, and more and includes Prima's wooden ribbon spool with 6 full spools of ribbon!  The store is saying these kits are sold out, but I am sooo hoping that is not true.

 
Here are some sneaks of the project I'll be showing you how to make on the show:
This carousel project is designed to hold your favorite photos and moments of 2011.  If you are planning to do Project 365 or 52 Weeks or Photo-a-Day then you are not going to want to miss out on this show .