Tuesday, May 25, 2010

A few more flower projects

The Flower Power Crop is still going strong at Scrapbook Heaven, and projects are pouring into the gallery daily.  Go check them out!

Here are a few more I wrapped up last night:

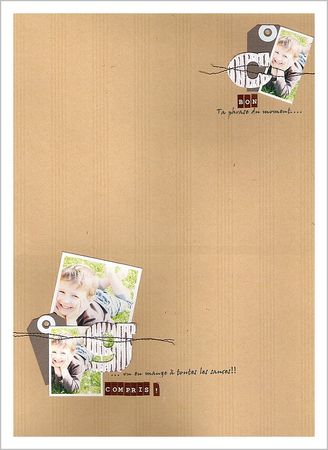
Paper: DCWV and My Mind's Eye; buttons: unknown,  letter stickers: AC Thickers; stamp: Autumn Leaves
This page uses  Scrapbook Heaven's Friday sketch.  The button flowers are from this tutorial for the Flower Power Crop.  With the sketch and the button flowers I had already made, this page literally took 15 minutes from start to finish.  Another one of those no-time-to-scrapbook busters!
These little earrings had me so excited while I was making them last night (and I don't even wear earrings!).  They go together in a flash (less than 10 minutes each).  And all you need is some colored wire (you'll see the color in the center of the flower), some seed beads in the color(s) of your choice, and some earring fixtures.  You can read through the tutorial linked above, but I will throw in some of my own tips.
  1. cut about a 1 foot length of wire
  2. thread 1" of beads onto the wire leaving an inch or 2 of wire at the end
  3. curve the wire into a petal shape keeping the beads taught, give a twist
  4. thread another 1" of beads onto the wire and curve into a petal
  5. wrap the long length of wire around the base of the petal
  6. continue threading the beads and wrapping the wire until you have 4 petals
  7. on the fifth petal, thread just under a 1/2" of beads
  8. slip on earring hook
  9. thread rest of beads until you have 1" in total
  10. form into petal and wrap wire
  11. wrap short end of wire between petals to form a nice center (use the leftover length as well)
  12. twist to finish in back and trim excess.
  13. repeat for other earring
I'm thinking these would make adorable slides for a chain or leather cord necklace, too.

The last project for today is this cute little drawer box. I am hoping to do a quick tutorial to share with you tomorrow.

box open


Monday, May 24, 2010

Beauty: Ribbon Flowers

 The flowers are still blooming for the Scrapbook Heaven Flower Power Crop.  These ribbon flowers were created with a Scrapper Scarf from Karen Foster Design that I picked up for 10c over the weekend at a scrapbooking yard sale (kicking myself for not scooping them all up!).  The tute for creating these super simple flowers from ribbon can be found here

Method Playground: Vintage

The challenge over at Method Playground is to go for the old.  Use vintage embellies, tea-stain your papers, or try your hand at waxwork.  Here's my design:
This is not my typical style, but I had so much fun putting this page together: going really girlie and just layering it on.  I started with a color-copy of a photo of my grandmother that we unearthed after she passed away a few years ago.  A good friend scored some vintage doilies, buttons and handwritten letters at Brimfield Flea Market, and I still had some trim left from my trip their last summer.  I spritzed the background with 7 Gypsies Paper Dye in a mix of pastel pink and walnut scarlet.  The book-page flower is from a tutorial over at Scrapbook Heaven.  As I was laying out the page, I glanced down to see my grandmother's name right there in the lower corner of the letter.  So perfect!  Finished the LO with a zig zag stitch to frame it.
The details: vintage doily, vintage letter, beaded hat pin, Prima flowers with rhinestone centers, handmade flower with pearl center, silk flower with vintage button center, Martha Stewart butterfly punch, pearl string glued in shape of heart.

Be sure to head on over to the Playground to be wowed by the other DT creations.  And join in on the vintage fun for your next project.  Link it up by next Monday, May 31.

Saturday, May 15, 2010

Flower Power Crop projects

Projects are in full bloom over at Scrapbook Heaven. 
Here are a few that I've managed to complete so far this weekend:
Of course, the journaling on these will come later--there's no time for journaling during a mad cropping party!

And a card:
know what that flower is made from?  a baby wipe.  yup, a dried up baby wipe--I kid you not.  go check out April's awesome tute (she used a used dryer sheet) 

Gosh, it feels like I should have more projects than that done.  I have made oodles of flowers, but need to add them to some projects.  And  I received the June Scrapbook Heaven kit and can't wait to get going on some projects using it.  It is chock full of all kinds of yummy goodies!  Yippee!

Friday, May 14, 2010

Scallop Circle Flower Tutorial

The Scrapbook Heaven "Flower Power Crop" is in full swing.  Check it out for loads of flower tutorials and inspiring projects.  There are some prizes up for grabs, too!  Here's the tutorial I shared:

You will need:

1) Punch your circles from your chosen paper. These look great from old book pages, patterned paper (non-cardstock), stamped copy paper.

2) Add some color. If you're using patterned paper, you can skip this step. Throw down some watercolor paints, some mist, some ink--whatever you're in the mood for.

3) Wait for them to dry, then stack 'em up and poke the center with a piercer (or if your piercer is clogged up with glue like mine, use a thick needle.)

4) Stick a brad through all the layers.

5) Starting with the top layer, crinkle it into the brad.

6) Repeat #5 for the remaining layers until it looks like this:

7) Now that you've smashed it to bits, unfurl some of the petals to form a beautiful little bloom.

8) Here are some others that I made from other materials:

9) And here's a completed project:

Now it's your turn! Create a flower using the same technique and then, use it on a project -- may be a layout, card or altered item. Don't forget to link it to this post in the forum at Scrapbook Heaven to be eligible for prizes. Projects due May 28th, 4pm est.

Happy creating!

Sunday, May 9, 2010

May Crop at Scrapbook Heaven

Just a quick post to let you know about an online crop that Scrapbook Heaven is hosting this coming weekend.  Check it out:

Scrapbook Heaven has done it again!! The Design Team has put together an amazing assortment of tutorials featuring flowers!! Have you ever wondered how to make the flowers you see on other people's layouts? Join us for our 3 day on-line “FLOWER POWER” event and create flowers you will be proud to add to your next project!


Complete rules will be posted in the forum.

Where: Scrapbook Heaven Forum
When: Friday May 14th – Sunday May 16th

Time: 9am – 4pm

Projects Due: May 28th

Bring a friend and receive an extra entry for the grand prize!
Share this with your Facebook friends for yet another entry!

Hope you will be able to join us at some point during the weekend!


And to tie your flower-making compulsions (or is that just me?!) over until Friday, check out this *green* tutorial I just found on Natalie's Creations for making those pretties pictured above.  I will definitely be whipping up some of these beauties.  It's time to raid the paper recycle bin again: menus, catalogs, old phone books (how did I not think of that!), junk mail, {oh ,and plain old patterened paper scraps would work, too!}. The only thing I love more than flowers is upcycled flowers!

Hope to see you this weekend at Scrapbook Heaven!

Saturday, May 8, 2010

A Pre-Mother's Day gift

My fabulous hubby gave me the gift of time today, so I put it to good use in the stUdio to get some LO's done.  He is a good, good man!

This one is for Lee's challenge of 2 patterned papers, 2 borders, and 2 different fonts.
created with a SU! kit, Thickers, and ABC stickers from Target's dollar spot
not sure why that 'o' is so flourescent--it doesn't look so psychadelic IRL!

This LO is based on Jules' sketch for this week. 
created with a mix of 2 SU! kits
This last one is for one of the sketches for May at Paper Craft Planet. I used the song I Hope You Dance as inspiration for the journaling.
PP: My Mind's Eye, K & Co, MAMBI and SU!; letters cut with Sizzix SU! Billboard
And, finally, I threw in a card using Char's challenge of pink, yellow and a flower.  I based it on this week's sketch at Mojo Monday.
PP's are from my scrapbox; embossing is Cuttlebug folder; quote is from a DCWV paper; flower is made with fabric using Rhonna Farrer's technique
That's it for today.  Hope you're having a fabulous weekend!

Thursday, May 6, 2010

Thanksgiving, Siblings and Baby Girl

I've been inspired by some sketches recently.  Here are a few LO's I've made this week.

Loved the white space in this page by Tempor'elles:
So I lifted it for my LO on Thanksgiving:

 Here are the May sketches from Paper Craft Planet:

And here's my take on the first sketch:
OK, confession time. I just reread my journaling and realized that I put my sister's wedding date (our year, but just the wrong day).  Yikes!  Don't tell my husband.  (What the heck is wrong with me???)
Journaling reads: I will always be your baby girl.  I may have grown up and fallen in love, but I will always be your baby girl.  The one who clutched tightly to your waist on moped rides.  The one who cried hysterically when you got pulled over for speeding.  The one who delighted in the games of Trot Trot to Boston and Knock on the Door.  The one who stood on the toes of your shoes as you walked around.  The one who learned so much from you.  I'm still learning from you.  And I'm still your baby girl. 

And here's one more take on the sketch above. 
Took some liberties here, but that's what sketches are all about, right?
Most of this page was created with a Stampin' Up! kits (forgot the name, but I'm sure it's retired)
Jouraling reads: To the outside world we grow old.  But not to brothers and sisters.  We know each other as we always were.  We know each others hearts.  We live outside the touch of time. ~Clara Ortega 

Isn't that a beautiful and true quote? 

There you have it.  What have you created this week?  I'd love to know (b/c I'm nosey like that!).

Tuesday, May 4, 2010

Method Playground: Fill your Pockets

It's my turn to host the challenge at the Playground.  So...I'm challenging you to create a LO with a divided page protector, like the kinds used in photo albums, or to store stickers, or trading cards. 
The layout design is already set for you.  All you have to do is fill up those pockets.  Use photos, patterned paper, mini works of art (like ATC's), memorabilia like maps, brochures, napkins, business cards, whatever!  Once you've filled your pockets, then lay some embellies on top of the protector.  Here's where you can get a little 3-d: flowers, epoxy stickers, brads, chipboard, again, whatever you can think of.  When you've finished your creation, don't forget to link it up at the Playground for a chance to win a RAK from me.

Monday, May 3, 2010

Laugh Run Play

Those wicked cute rub-ons are from Rusty Pickle.  So sorry they closed up shop.
This LO is for Jules' color scheme challenge for April: red white and a touch of blue. 

Here's the how-to on the title:
  1. Stamp the image (in my case, the word "run") with Versamark (or light colored ink). 
  2. Use acrylic paint to lay down paint where you want it and let dry.
  3. Use a dark ink (I used black Staz On) to stamp same image on top of paint.

dream grandly.live deeply.create daily


I created this canvas last weekend during Cocoa Daisy's Spring Crop. It was so fun to get out the paste and paints and play around--that's what it's all about, right!?

Here are the deets:
  1. I spread some modeling paste onto a 9x12 canvas and let dry.  I used good old Crayola watercolors to apply a wash in turquoise, then added some lime to the edge and held the canvas upright so it could drip down.  A few splatters of raspberry and turquoise and the background was done. 
  2. The branch was cut using the Craftwell eCraft Fundamentals 2 card.  It's hard to tell from the photo, but I ran the branch through the sewing machine to give it a bit of stitchy texture.  Then embellished it with some folded paper flowers.
  3. The butterflies are cut with the Sizzix Butterflies die from My Mind's Eye paper (the tiny one is a Martha Stewart punch) and embellied with rhinestones.
  4. The wording is something I came up with for my 2010 planner, and thought it would work well here.  The pink stickers are Basic Grey and the rubons are American Crafts.
Whip out some paints and dress up a canvas!  Have fun!!