Showing posts with label christmas. Show all posts

Wednesday, December 18, 2013

top dog dies: gift bags

Thanks so much to all of you who visited during the Blog Hop last week.  I loved reading through your sweet comments!

I am back today with a few last minute gift wrapping ideas.  I probably shouldn't admit this, but gift cards are my go-to, last minute gift idea.  When time is running out, and my poor little brain can no longer think up something clever to give, I grab a gift card.

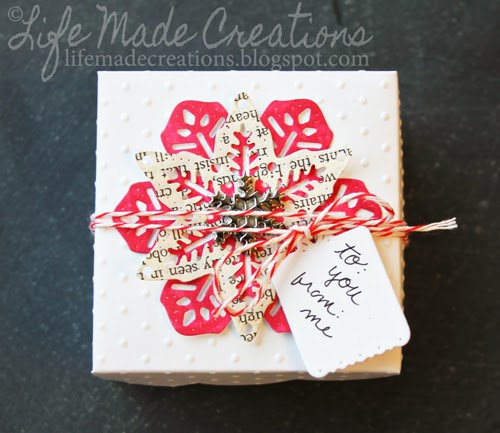
Gift cards themselves are pretty boring, so that's where a little fancy wrapping comes into play.  And Top Dog Dies makes it so easy!  I used the Treat Bag Die to create a super fast gift bag just the right size to hold a gift card.
Treat Bag Die
With a quick little embellishment and a gift tag, you are good to go give.


These little dimensional snowflakes are super easy.  Just fold in half with insides facing along the long points, then fold in half with outsides facing along the in between points.  Poof it up and tack down the snowflake tips with wet glue.


I have one more last minute gift idea for you: fill a little gift bag or bucket with
layer up some Top Dog Dies:

and sign the back with:
How cute is that? (Can't take credit for the wording; saw it on Pinterest)

Here's one more take on the idea using the Treat Bag die:


Here are the dies I used to create these bags (click on the image to be taken to the Top Dog Dies store):


Thanks so much for stopping by, and I'm hoping that all of you are in better shape than me with your last minute gifts! 

Wednesday, December 11, 2013

top dog dies: blog hop!


Hi and welcome to the next stop on the Top Dog Dies blog hop!
If you're just starting out, be sure to read the bottom of this post to enter the awesome giveaway from Top Dog Dies and find links to the rest of the design team's amazing projects.

Today, I'll be sharing a pretty beaded ornament:

Gather your supplies.  You'll need the Trio Snowflakes die, some papers and card stock, beads, twine and glue.

Cut 5 of each snowflake.

Fold each one in half.

Glue each layer together at the center leaving the edges loose.

Glue the back of each edge to the back of the next, lining them all up on the folds.  Glue the final edge to the first edge to create a circle.

Thread some twine through the center.

Tie a knot at the top leaving a loop for hanging and tuck the knot inside the center seam with a dab of glue.

Thread some small beads at the top, and some larger beads at the bottom of the ornament.

Hold it up to the snowy window to appreciate its glittery sparkle.

Contemplate making dozens more to give as gifts to teachers and staff, neighbors, coworkers, etc.
(then if you're like me, conclude that that's just crazy talk, and just make one)

Since it's going to be a gift, it will need a coordinating gift box for giving.

Use the Scallop Box Die and create a box with the same papers and a tag from Darby Doilies and Tags.

Tie it all up with some twine and give to someone special.

Thanks so much for hopping over.  Hop on through each DT member’s blog to get the details on their fab creations:


                                                                   Michelle Neddo <------you are here   
Angela Bode
Shellye McDaniel


The party isn’t over just yet, though: We’re giving away $50 Top Dog Dies eGift Cards to two lucky winners. Entering is easy: Just add your email address here and you’ll be included in the giveaway!

You can earn extra entries by commenting at each stop along the blog hop and by following Top Dog Dies on Facebook, Twitter and Pinterest. Even better news? You have until Friday Dec. 13 to enter and we'll announce the winners on Monday Dec. 16.
Thanks for joining us for our first – but definitely not our last – blog hop. 
Happy hopping!

Friday, February 1, 2013

a crochet stocking

I have another crochet project to share with you today:


Yarn: Lily Sugar and Cream in 
Hot Pink, Hot Green, Powder and Red

To make the hexagon motif, I followed rounds 1, 2, & 3 form this Red Heart pattern.  For the final round (hot pink) I did the following:

join new color in corner space of round 3
ch3 (counts as first dc), dc1, ch1, 2dc all in corner space
dc1 in each stitch along side
in corner space: dc2, ch1, dc2 
repeat around and join with slip stitch to top of beginning ch3

Then I followed the instructions in this pattern from Priscilla Hewitt to join the motifs.

That's one stocking down, 4 more to go by December 1st!

Thanks for looking!


Thursday, December 13, 2012

advent calendar

One of our favorite traditions is to countdown the days until Christmas with an advent calendar.  In years past we have done the cheesy cardboard chocolate ones, the Lego ones, and wrapped Christmas books.  For the past several years we had a little wooden one with numbered doors behind which we stashed little treats and trinkets.  

The problem with that calendar was that we have 3 boys which = bickering over whose turn, complaints about who got what, waking up extra early to open the calendar and all of that = one unhappy momma.

So this year, I got smart.  I started a Pinboard of advent calendar ideas:
view the board here
And I decided to make this year's countdown to Christmas about spending meaningful time together, rather than about "stuff."  

24 embellished pockets hang from strings attached to a picture frame.


I put the more time-consuming activities in the weekend pockets.  Our weeknights are busy with three boys in hockey, guitar lessons, homework, etc.  This is meant to be fun and stress-free.  If we can't get to an activity one night, we simply switch it out or double up on another night.  So far the boys have loved it!  Their favorite was definitely the special hot chocolate party:
{Intagram pic}

And mine would have to be the giant popsicle stick snowflakes:
{Instagram pic || idea pinned from here}


Thanks for visiting!