Monday, October 31, 2011

Pinspire Me Monday: Christmas card album

Happy Monday, and to those of you celebrating, Happy Halloween!
It looks more like Christmas around here than Halloween, though.
Yesterday we woke up to this:

And then the sun warmed things up to reveal the colors of fall against the pure white snow:
It was really quite beautiful.  But the storm knocked out our power for about 7 hours.

So on with this week's Pinspire Me Monday. 
 I just finished my project (when will I learn to not be such a procrastinator?).

I love finding new ways to use/save our holiday cards:
  • using card fronts as gift tags or accents on scrapbook pages
  • turning artwork into new cards
  • slipping them into photo sleeves 
I loved the idea of binding them all into a book--the boys love to look through the photos throughout the season, and even the year.

So here's my Pinspired Project:

 Although I loved the ease of simply punching holes in the cards and sticking rings on them, I somehow feel the need to take a simple project and put a complicated spin on it.

So here's my process:
  1. Match up cards according to size
  2. Glue card pairs together along one side (the side opposite the one the binding will go into)
  3. Cut strips of cardstock wide enough to fit the binding (I used 1 1/2" for the Bind it All)
  4. Cut the strips to the same length as each card pair
  5. Glue between card layers
  6. Punch holes for binding and bind together (I created a front and back cover from chipboard)


I love how the cards still open to reveal the greetings inside.


What's Pinspiring you lately?  Please share it in the side bar!

Saturday, October 29, 2011

Thanksgiving Banner: a class & a kit!

Give Thanks Banner: Class & Kit

Thanksgiving is a time for family gatherings, counting blessings, and fabulous food.  And at the heart of celebrating is your home.  How about a special handmade banner to decorate your home this fall season?

 
In this class, you will make the trendy banner pictured above.  You’ll learn how to create layered medallions, fashion a beautiful pearl-centered flower from paper, and upcycle the pages of an old book into a project you will love to hang in your home for the fall!


This class is being offered at my home stUdio.  But for those who aren't a stone's throw from Boston, I have put together a few kits for sale right here on my blog.  This is my first time using Pay Pal to take payments, so we'll be finding out together if this is going to work!

Here are all the goodies included in the kit (plus two green leaves for the flower--forgot to add those to the photo):
Kit contents:
  • 11 sheets of book paper
  • 11 sheets of cardstock (from the DCWV Harvest Gathering Stack)
  • 11 assorted pre-cut and scored strips to make paper rosettes
  • 11 assorted scallop cut circles
  • pre-cut letters to spell "Give Thanks"
  • 3 large and 3 small die cut flowers to make paper rose (colors may differ from the yellow pictured above)
  • 3 pearl beads for flower center
  • 1 length of twine for hanging
  • 2 templates for cutting the pennant shape
Supplies you will need:
  • scissors
  • double sided adhesive or glue stick
  • liquid adhesive for paper
  • hot glue gun--you can use liquid adhesive, but the hot glue makes speedy work of the rosettes.
Everything will come boxed up and arrive right at your doorstep:
SOLD OUT!

To order, use the PayPal button below to choose one of the shipping options ("no shipping" if you live locally and would like to pick up your order, "shipped to you" if you would like the kit to ship directly to you (the extra $5 covers s/h).  Currently, I am only shipping within the US, but please email me for international shipping rates.

The project is pretty self explanatory, but I'll be posting a video that walks you through assembling one pennant and the dimensional flower next week.

Friday, October 28, 2011

Page Maps Sketch and a BIG peek

It's been a loooong time since I played along with Page Maps
But this sketch caught my eye:

Maybe it was those cute little acorns, or the November Scrapbook Heaven kit product I was surrounded by.  Or maybe it was this fab prize package Becky has up for grabs:

Whatever it was, I had fun putting this simple page together:


And with this layout being created with only product from the November Elite kit, this is a BIG sneak peek of what's in store for November. 

Thanks for looking!

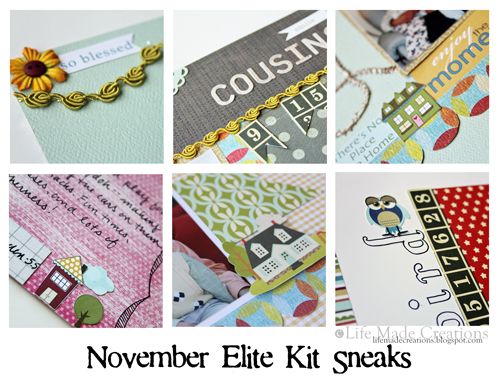
November Kit Sneak Peeks

October is blowing out of here and leaving a dusting of snow as it says goodbye here in New England.  How did this happen?  I haven't even put away the shorts and bathing suits and I already need to pull out the snow pants and mittens.  I don't like it.  Not one little bit.

Well, it's almost time for new kits to hit The Store, so here are some sneakie peeks for you:
Got a bit happy with the Tim Holtz rosette die this month.  

Come back Tuesday for the full reveal!

Monday, October 24, 2011

Pinspire Me Monday: crochet owl pouch

It's Monday!  Time for another Pinspire Me Monday.  
Can it be?  Monday may just turn into my favorite day of the week!

So here's what Pinspired me last week:
photo credit: Crochet Ninja
A little crocheted owl coin purse from A Crochet Ninja.  Is he not the cutest?!  The owl was simple as pie to hook up (and now that I'm looking at him, I forgot his little beak and feathers--whoops!).  It was that zipper that had me procrastinating this project until just this morning.  I've never done a zipper before.  I was scared.
But I conquered my fears, bought the zipper, consulted with the nice woman at the cutting counter of the fabric store and set to work on it.  Only took me two tries to get it right.  Third times a charm, right?  The first time I sewed the zipper to the liner inside out--whoopsie!  The second time I hand-stitched the zippered liner to the owl a bit off center.  Let's just say my seam ripper is my new BFF.

But here he is all zipped up and ready to use (minus the beak and feathers I'll be adding shortly):


Itn't he cute!  I'm toying with the idea of adding a crocheted strap to him to make him a wristlet.

Now it's your turn.  Link up one of your Pinspired projects in the sidebar (it's very empty and sad over there...).  Remember it can be anything you've found on Pinterest and tried for yourself: a recipe, a decoration, gift-wrapping, a photograph...anything!


Can't wait to see what you're finding Pinspiring these days!


Friday, October 21, 2011

Sketch Crop


There's a sketch crop going on at Scrapbook Heaven!  If you are a fan of sketches, hop on over to the forum to check out

Here are the sketches I created for the crop:

The idea for this crop is that you can use each sketch for both a layout and a card, and then you can flip or rotate the sketch to create a whole new project.  Fun, right?

Here are the projects I created with my sketches:
a layout with a cute little banner
Then I took the banner portion of the sketch and put it on a card:

Here's my second sketch from above.
The card:


turned into a layout:

So if you're inspired and have some time to create this weekend, join us over in the forum.  There's a fabulous prize package up for grabs if you upload your projects before midnight on the 31st.  Hope to see you there!

Thursday, October 20, 2011

Halloween Treats Tutorial

I love getting ready for Halloween.  The decorating, the costume making, ...the CANDY!  Ok, yup that might be my most favoritest part.

Every year, I create a little goodie for the boys to take into their classmates.  It will be sad when they are too old to do this (like my middle-schooler this year).

Here are this year's treats for my youngest's kindergarten class:

Here's what you'll need:

And here's how you make them:
click on photo to see larger
 10. Fill with treats and give!


Enjoy!

Tuesday, October 18, 2011

Farm Invitations

Moo, Baa, Cluck!   Here's what was on my desk this past weekend:


I love when I can collaborate with a client to create an invitation to fit perfectly with her party's theme.
In this case it was "Fall on the Farm": apple and pumpkin picking, hay rides, a corn maze, caramel apples.
It took a couple of tries:
not "fall" enough
getting warmer, but how about some leaf paper and a cornstalk
Ahhh, perfect!
 

Signed, sealed and delivered!

Have a very happy 9th birthday, Savannah!

Monday, October 17, 2011

Pinspire Me Monday: Framed Chalkboard

Welcome to the first {official}
I hope you will play along and link up some of your Pinspired Projects (see the sidebar).


This was one of my first Pins, so it is only fitting that it be my first Pinspire Me project:
photo credit: English Organizer
When I saw this fabulous chalkboard, I knew I had the perfect frame to use for it just sitting in our attic:
 Here's a little background {feel free to skip right over this}:
This was the first piece of art that hubby and I bought for our first home in 1998.  When we moved to our new home in 2004, I thought I would be oh so cool and give the frame a white wash treatment to better match our decor here.  I not so quickly discovered that a white frame on this piece of art completely washed out the colors of the picture.  I then tried to undo my mistake by sanding off the paint.  Ummm, that didn't quite work in all the intricate detailed parts.  So I stashed the whole thing up in the attic and tried to forget how I ruined it (thankfully hubby and I had both grown tired of the picture anyway).

Fast forward 7 years and enter this Pinspiring chalkboard frame:


Here's all it took

ONE:
Any frame will do, but ornate vintage looking frames add that special something.
Scour those fall yard sales and see what you can find.  It's the thrill of the hunt, right?!

 TWO:
Seriously, I almost skipped this part.
I mean how much grime can one little picture frame gather from 7 years in an attic {wink}.


THREE:
 I got out the old Frog Tape, which worked beautifully by the way, and taped off the frame.  Typically I go rogue and skip the taping part, but I had little hands helping me with the painting.  Better safe than sorry I always say.

FOUR:
Just some good old fashioned chalkboard paint.  I've had this one little can for years and have painted several surfaces with it.  It's like the magic pot of paint that just keeps replenishing itself.
This took two coats to cover.

FIVE:
Paint the frame.  Completely spaced on the photos here {whoops, sorry!}.  But I can tell you I did another wash (just mix a little water in with the paint).  I didn't want to get bogged down with even coverage in all those tiny cracks and crevices, so this was the easiest solution.

And voila!

Now I gotta get hubby to hang it up on the wall in the kitchen.  This baby is HEAVY!

ETA:  Forget hubby. I go to Pilates, I have {a tiny bit of} muscle in my arms.  Got the board hung into the studs and everything.  Hubs will be so proud!

Your turn.  Link up your Pinspired Projects in the side bar.  Can't wait to see what has Pinspired you lately!

Have a fantastically inspired week!