You will need:
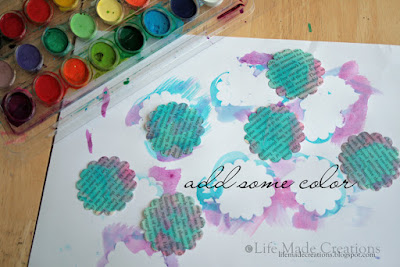
1) Punch your circles from your chosen paper. These look great from old book pages, patterned paper (non-cardstock), stamped copy paper.
2) Add some color. If you're using patterned paper, you can skip this step. Throw down some watercolor paints, some mist, some ink--whatever you're in the mood for.
3) Wait for them to dry, then stack 'em up and poke the center with a piercer (or if your piercer is clogged up with glue like mine, use a thick needle.)
4) Stick a brad through all the layers.
5) Starting with the top layer, crinkle it into the brad.
6) Repeat #5 for the remaining layers until it looks like this:
7) Now that you've smashed it to bits, unfurl some of the petals to form a beautiful little bloom.
9) And here's a completed project:

Now it's your turn! Create a flower using the same technique and then, use it on a project -- may be a layout, card or altered item. Don't forget to link it to this post in the forum at Scrapbook Heaven to be eligible for prizes. Projects due May 28th, 4pm est.
Happy creating!


hihi :) may i just check which size of scallop punch did u use for the flowers? :)
ReplyDeletethank u :D
Hi Purinne! Thanks for visiting. The scallop circle I used is 1 3/4" across and the finished flower measures approx. 1 1/2" across. Experiment with different sized circles and mix and match them on your project. You could even try plain circles. Have fun! And if you make something, come back and share your link!
ReplyDeleteBeautiful.....thanks for the technique! These would be perfect birthday cards for all my buddies born in the spring.
ReplyDeletethank u~ :)
ReplyDeleteI can't wait to try this one!
ReplyDelete