Showing posts with label home decor. Show all posts

Monday, May 26, 2014

{ crochet } a banner


There's something about banners that puts a happy smile on my face.  This little project combines three of my happy's: banners, crochet and rainbows!
It is made of single crochet triangle motifs trimmed in a scalloped edging.  

In case you would like to make your own, here's the pattern I made up as I went along:

Triangle:
I used an F hook (3.75mm) for the triangle, and a D hook (3.25mm) for the edging.
ch2, sc in first ch made, ch1, turn (2 stitches made)
sc in same stitch, sc in each of next 2 stitches (3 stitches made)
Continue this way, increasing by one stitch in each row until you have 20 stitches.

Here is a close-up of where you will put the last stitch in each row before doing the ch1, turn.  You will see 3 horizontal loops and then a vertical loop.  Insert your hook at the vertical (arrow) to make the last sc in each row.

Fasten off and weave in ends.

Trim:
Along the edging you will see small holes created from the first chains in each row (9 clearly visible on each side). Use this photo as a guide for where to work your edge scallops:

Join trim color to top left corner of triangle and work 1sc, 1hdc, 1dc, 1hdc, 1sc in each hole along edge (10 scallops in all).
Continue working 10 scallops up the other side (shown above with black dots).
At top of triangle, work a sc in each stitch across (20 total).
Ch1 and work another row of sc.
Fasten off and weave in ends.

Continue making triangles until you have as many as you like.  I recommend blocking them--it just helps them lay nice and flat when hanging.

Joining the triangles:
I created a separate piece and stitched my triangles to it.  You may come up with a more genius way of joining them, but I went with what was easier for me.  
To figure out the length:
I led with 20 chains on each end, 10 chains in between each triangle, and then 20 for the length of each triangle.  So for my 5 triangles, I needed a chain of 181 = 40 (ends) + (20 x 5) + (10 x 4) (plus 1 for turning ch)

Ch181, work a sc in each chain across (180).
Fasten off.
Using a whip, stitch attach each triangle to the length.  I used stitch markers to temporarily and evenly attach my triangles for stitching.
Weave in all ends and hang your new banner!

Currently, ours has made his home in our guest bathroom:


Happy Crocheting!

Thursday, May 1, 2014

{ crochet } spring wreath

It was a long, cold, snowy winter.  You would think after living in New England for my entire life I would be used to this by now.  But somehow this one seemed worse than the typical New England winter, and by the time we were well into April, I realized we still had our winter wreath on our front door.

I had to remedy that problem, and quick!  The faster I could kick winter out the door (or at least off the door) the better.
Hello happy little spring wreath jazzed up with an Instagram filter and the Rhonna Designs app.  "Little" being the operative word here.  The styrofoam wreath I had on hand was a mere 10" and the finished wreath looked tiny on my door.
But rather than do the whole thing over, I lazed out wrapped a 12 form in the same green yarn and tied the small, embellished one to the larger one.
I adorned the yarn-wrapped wreath with crocheted flowers and pompoms.


 Pattern links:
large pink rose: Hille Knits
blue flower: Attic 24
(I'm pretty sure this is the pattern I followed, but somehow I ended up with 8 petals, not 7. . . hmmm.  Oh, and I only did the first two layers.)
coral flower: Mollie Makes
(Again, just the first layer of the flower.  And I crocheted a separate simple circle piece to dress up the center: 8sc in magic loop, then 2sc in each st around for a total of 16 stitches)
small rosebuds: Moogly
(I began with a ch18, rather than ch24)

The pom poms were made with the 1" and ¾" Clover Pom-Pom makers.

Happy Spring!


Wednesday, April 30, 2014

{ crochet } leafy twig

Yesterday, while stumbling around on Pinterest, I came across Mamachee's blog (how cute is she?!), and specifically this post where she clothes a naked branch with the cutest little crochet leaves ever.
So of course I had to whip some up.

They come together incredibly quickly, so I made a rainbow of them.
 I used DK weight yarn and an E hook.  I especially love her technique of slipstitching up the center of the leaf to create the "vein."  

My tip: don't fasten off first, just slip stitch to the first sc and begin slip stitching up the center to the picot stitch.  Also when I crocheted up the other side of the foundation chain, I crocheted over my tail--one less end to weave in makes me happy!
 I glued them to the ends of a fallen twig from the backyard with the teensiest drop of hot glue.  
And now this happy little branch adorns our kitchen windowsill and makes doing dishes a little more appealing (just a little).

floral wall art

Hello my little blog!
Couldn't let the entire month of April slip on by with only two posts.  Not sure what happened this month, and not about to make any excuses (like maybe gorgeous weather after a looooonnnnnggg winter indoors, or spring cleaning the house, or hosting the Easter holiday, or three boys home for a week off from school, or reading, reading, reading).  But one thing is for sure, I have actually been creating some fun projects that I promise to share with you in the coming days.  There might even be a free cut-file download just for sticking through this quiet-around-here month with me.

Once in a while you make something that you just fall utterly and totally in love with.  This is one of those projects.

I used my Silhouette Cameo to cut most of the flowers using gorgeous cut files from Jamie Cripps.  You can find her amazing designs in her Silhouette Store.

Her blog contains easy-to-follow instructions for assembling each of these fabulous blooms.

I had so much fun putting them all together to fill a metal ampersand I had scored on clearance at Target.

The inspiration for this project came from the amazingly talented Cole Franke.

Thanks so much for stopping by!

Wednesday, January 1, 2014

top dog dies: typography

Happy New Year!
It's a new year and I have some new projects featuring Top Dog Dies to share with you today.

This month I received some super fun dies to create with, including this vintage alphabet die:
First up, a little "HELLO 2014" card to ring in the New Year.

dies used: Vintage Alphabet, Photo Mats, Cherish Doilies and Tags
This card is sized at 3x4 for Project Life, but would also make a cute embellie for a card, scrapbook page or mini album.

Typography is an art in itself, and this die is perfect for easily creating artsy backgrounds. 

dies used: Vintage AlphabetCherish Doilies and Tags 

 I used the same idea of a typed background to create this little altered tile:

The leftover letters from the above card were glued onto a ceramic tile with a simple message.

I haven't decided if I want to glue a pretty ribbon to the back for an entryway wall hanging, or to seal it and use it as a coaster.  Decisions, decisions. . .

The following dies were used in these three projects:


I'll be back later to share my One Little Word for 2014.

Happy New Year!

Wednesday, December 11, 2013

top dog dies: blog hop!


Hi and welcome to the next stop on the Top Dog Dies blog hop!
If you're just starting out, be sure to read the bottom of this post to enter the awesome giveaway from Top Dog Dies and find links to the rest of the design team's amazing projects.

Today, I'll be sharing a pretty beaded ornament:

Gather your supplies.  You'll need the Trio Snowflakes die, some papers and card stock, beads, twine and glue.

Cut 5 of each snowflake.

Fold each one in half.

Glue each layer together at the center leaving the edges loose.

Glue the back of each edge to the back of the next, lining them all up on the folds.  Glue the final edge to the first edge to create a circle.

Thread some twine through the center.

Tie a knot at the top leaving a loop for hanging and tuck the knot inside the center seam with a dab of glue.

Thread some small beads at the top, and some larger beads at the bottom of the ornament.

Hold it up to the snowy window to appreciate its glittery sparkle.

Contemplate making dozens more to give as gifts to teachers and staff, neighbors, coworkers, etc.
(then if you're like me, conclude that that's just crazy talk, and just make one)

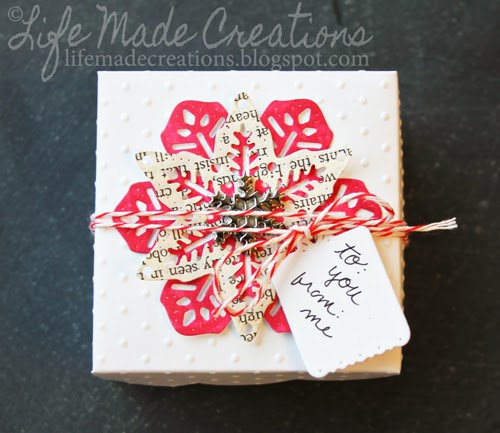
Since it's going to be a gift, it will need a coordinating gift box for giving.

Use the Scallop Box Die and create a box with the same papers and a tag from Darby Doilies and Tags.

Tie it all up with some twine and give to someone special.

Thanks so much for hopping over.  Hop on through each DT member’s blog to get the details on their fab creations:


                                                                   Michelle Neddo <------you are here   
Angela Bode
Shellye McDaniel


The party isn’t over just yet, though: We’re giving away $50 Top Dog Dies eGift Cards to two lucky winners. Entering is easy: Just add your email address here and you’ll be included in the giveaway!

You can earn extra entries by commenting at each stop along the blog hop and by following Top Dog Dies on Facebook, Twitter and Pinterest. Even better news? You have until Friday Dec. 13 to enter and we'll announce the winners on Monday Dec. 16.
Thanks for joining us for our first – but definitely not our last – blog hop. 
Happy hopping!