Friday, September 12, 2014

woodland bookmarks: a silhouette tutorial

I was searching for a cute little token to give my kindergarten students for the end of the school year.  Searching for "bookmarks" on Pinterest turned up these little cuties at EllinĂ©e:
photo credit: www.ellinee.com
They were designed by the talented Lia Griffith
I downloaded them (they're free!), and opened the file with my Silhouette Studio Designer Edition software.  From there, I was able to turn them into print and cut files using the trace feature:

How to: uncheck High Pass Filter; dial threshold up to 100% (or there abouts); select Trace Outer Edge.

Next, I added my text in the color and font of choice using the text and line color tools:

Then, tell the Silhouette not to cut your text:

How to: go to the Cut Settings menu; select the text in your project and select "no cut" in the Cut Style options.

Lastly, place your print and cut registration marks and move your project to fit (avoid placing anything on top of the shaded sections):

Using the Print and Cut option, send it to the printer, then to your cutter, and you will end up with the cutest batch of personalized woodland bookmarks ever!
To add some stability, I backed mine with tongue depressors and "laminated" them with heavy duty clear packing tape.

Thursday, September 11, 2014

crochet seashells

This summer a colleague and kindred-crochet friend of mine issued a summer challenge, a little summertime C-A-L if you will.  It involved crochet and seashells.


In the summer?! Of course I took her up on it! The patterns she found were designed by Susan Whitlock.

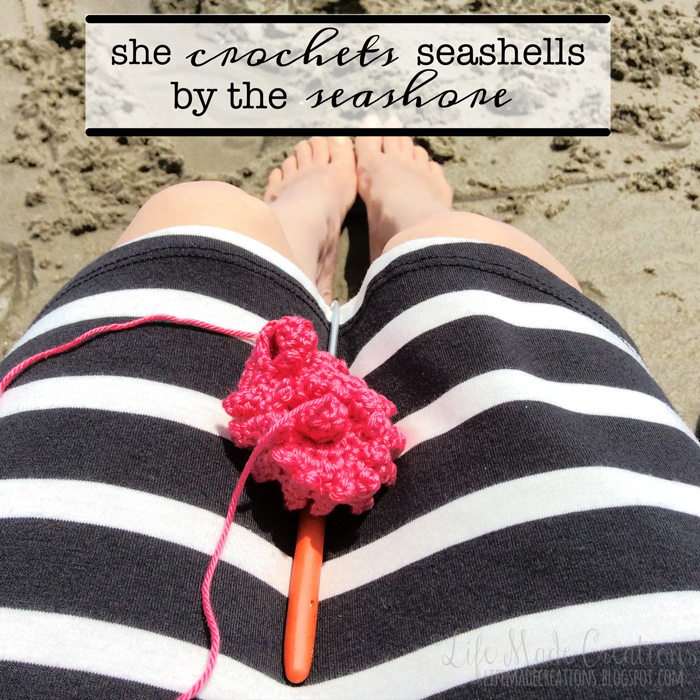
I got right to work because I know myself, and the procrastinator I can be.  Plus, we were headed to the beach and I really wanted to be able to take a photo with this caption:


I started with Medium Sea Shell #1, and let's just say it was...um...not very seashell-looking.

Seriously?!?  I ripped it out and started over.  This time it came out a bit better.  I got to learn the style in which Susan was writing her patterns.  I learned that the finishing stuffing and stitching makes a huge difference in how your shell turns out.  Stuff the top, but not too much (my orange one is over-stuffed) Make sure to really tuck that loose end into the shell to create the spiral that a shell has and keep the bottom tip open and flat (like the blue one).


And since I have this thing for rainbows, I searched for some other shells from Susan and found these cuties.  I hooked up the tiny seashell in purple to complete the rainbow.


I love my little crochet seashell collection!

And since we both completed the challenge with a good month of summer left, the overachiever in me issued us this challenge:
I mean, how cute is this!
You can find it in the February, 2014 issue of Inside Crochet
It was designed by the brilliant Emma Varnam.

But this one is not coming together as quickly as seashells.  It involves lots of slow-going single crochet, and lots of hand stitching (something I'm not a fan of).  Maybe it'll be done by next summer!

Happy crocheting!


Monday, September 8, 2014

a little summer recap

Well, hello!

Inside I'm bowing my head in shame that I have been gone from here for so long.  But outside I'm going to chalk it up to an inadvertent, impromptu sumer vacay.
And it was glorious.

This summer we put in a pool
#madewithstudio
It completely changed our lifestyle.  Days spent lounging, relaxing, and worry-free
#madewithstudio

We took our annual vacation to the beach
#madewithstudio

where we did more relaxing.  I mean how could you not with a view like this

We watched ocean sunrises (okay, maybe I was the only one willing to get up early enough)

and evening moonrises

We enjoyed fresh picked fruits and vegetables


I spent some time purging and reorganizing

some time creating pretty things

and some time crocheting

The boys discovered a passion for fishing

and did some creating of their own

And then before we could even blink, summer was over and it was time to head back to school

But we learned that, especially in summer, every day is the best day of the year.
#madewithstudio
Looking forward to being back into a bit of a routine which will include more posts on here.  I've got some fun projects to share with you in the coming weeks, so please stay tuned.

Thursday, July 3, 2014

app spotlight : studio

I have a new favorite App to share with you.
Studio Design by Overlay Studio, Inc.
It's a social media app for photos (much like Instagram), with the added bonus of graphic design.  You can create an original "mix" using their ENORMOUS library of trendy design elements.  There's hundreds and hundreds of graphics, shapes, frames, words--all available for free.  It has an incredibly easy user interface (I'm geeking out here!) where you create your design in layers, making it easy to edit, arrange, and delete as you work.

Here are some of my designs #madewithstudio:


I love using it to create little inspiring pieces of quote art:


Not feeling creative, Studio has you covered.  Simply hit the "Remix" button on any other user's design and fill in the background with your photo:


You can use the hundreds of elements included in the app to design your own little unique pieces of art:


Or create tools to document your life

Others invite you to remix their designs and share a piece of yourself


Mostly I love this app to design and document our memories

Currently it's available on the App Store and Google Play.  And it's free!

Monday, June 30, 2014

crochet mood blanket : april, may, june


I just wrapped up the final month for my crochet mood {turned un-mood} blanket.  
Like many New Year's resolutions, I began this project highly motivated and with all the possibility a new year has to offer.  Each square took me less than 10 minutes to complete, surely I could take 15 minutes at the end of the day to reflect on my mood, choose a color to match, and then stitch up a block.
And I did, for a good 2 and a half months.  Then you miss a day {or 4).  And you try to remember what mood you were in 4 days ago. And you try to pick a color that goes with that mood, but one that would still look good in your blanket.  And it's feeling more like a chore than a fun hobby.
April 1st I decided to ditch the "mood" part of my mood blanket and just use colors I liked.  It was fun playing with colors--April went along great.


But now that I wasn't tracking moods, the blanket kind of lost its meaning.  It was turning into "just a blanket."

I was getting bored doing the same square over and over.  And the ends.  Oh the endless ends that needed weaving.

 Sure it was great to be able to take this project anywhere, and I did: the orthodontist and dentist appointments for the boys, the ice hockey rink and lacrosse practices, lunch breaks at school, and outside in the sunshine. 

 The fun was good while it lasted, but I could tell it was time to call it quits.  So I made it through 6 months, half of a year, and will end up with half the blanket I originally set out to make.  I'm ok with that.  The way I see it, I can now work on a second blanket for the other half of the year.  A sort of two-for-the-price-of-one deal!

Made with Collect and Rhonna Designs apps


Made with Collect and Studio+ apps.