Showing posts with label felt. Show all posts

Thursday, November 15, 2012

fall wreaths

I have a new love.  

Wreaths.

This week I've been working on some home decor items in preparation for Thanksgiving.  I had a wreath idea floating in my head: a combination of three I had seen on Pinterest:

I loved the burlap base of this one:


The felt flowers on this one:


And this twine wrapped letter:


I got to work on the funnest part: the felt flowers:
{Instagram pic}
{I wanted to do up tutorials for each of these myself, but time is scarce these days so I'll just link you to some great sites where you can find similar flowers}

**white rose**
**green and grey puffs**
**yellow and blue looped**
**chocolate**

Then I found a grape-vine wreath for $4 and change (we won't discuss the tacky felt turkey that was attached to it).

I fiddled and played with the burlap--cutting strips, making running stitch ruffles, twisting and turning.  It was just not working out for me.  A quick Google search turned up this burlap wreath tutorial.  How genius is that?  A wire wreath and some burlap strips!

I cut my strips to about 4 x 10", fan folded them and skewered them onto the hanger.

And then I ran out of burlap.

Necessity breeds creativity (or maybe it's "necessity is the mother of invention").  However it goes, I was not giving up on this project.  I went to my newly organized fabric drawer and pulled out some fabric.  I tore it into 1" by 6" strips and tied 2 between each section of burlap.


A fresh coat of paint on a little wooden banner that came on the ugly turkey wreath and a scripted "welcome" and the wreath was complete!

That fabric couldn't be a more perfect match for our purple door--running out of burlap was the best thing that could have happened to this wreath!

But now I had another little problem.  What to do with all those felt flowers I had made?

Make another wreath of course!

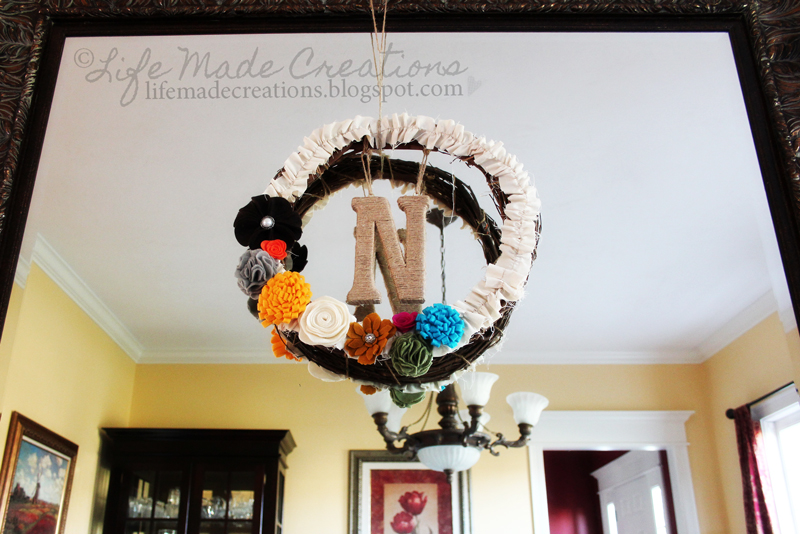
I still had the grape-vine base and a twine covered monogram.  I stitched up some muslin ruffles and hot glued it all together:


It's hanging on our dining room mirror:


Now back to more Thanksgiving prep!
Thanks for looking!


Wednesday, March 24, 2010

Flower Power

Spring is finally here, and sometimes the weather even seems to realize it (though not lately with chilly rain and winds). So I thought I would do a little flower tutorial thingie here on my blog. Well, low-and-behold, that crafty Lolly has a flower week going on at her blog right now, and it is AMAZING! So, as I see it, she's doing all the work coming up with the fantabulous ideas and pointing us in the direction of all the how-to's and we can just sit back and create all the fun projects, like these two little beauties I made from her post for yesterday.


Felt flower made with the Sizzix circles die
Wire ribbon rose
Oh my golly, jump on over to Lolly's and check out what she's got blooming!

Wednesday, January 27, 2010

Method Playground: Felt

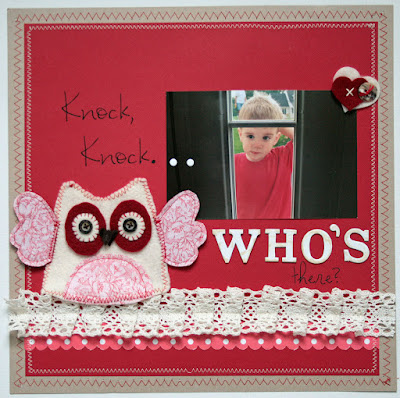
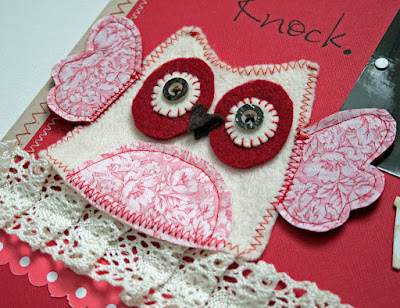
It's time for another challenge over on the Playground. This week, Miwako is asking us to play with felt. I used some felt and fabric to create this cutie owl embellishment for my page. The pattern for him came from a sewing project calendar I picked up to help with my 20-ten resolution to sew more. You can find the pattern here.
So fly on over to Method Playground and link up your felt creations.

Sunday, November 8, 2009

Holiday Card Catch-up {days 6, 7, 8}

What is it about the weekends that just makes it so darn difficult to find creative time?! I always go into the weekend with high hopes of spending several hours in the stUdio. Oh, well; it feels good to be caught up on my card-a-day's. So here they are:


Day 6 A little hand-made felt snowman sitting in a felt snowbank.
The snowflakes are heat embossed.
Day 7
I've had this snowmanfabric kicking around since my sister and I
went crazy one year with gifts in a jar topped with fabric covers.
I cut out the square and ironed it to a piece of Pellon fusible fleece
to give him a little quilted look. I sewed him to a mini card and frayed his edges.
The BG is embossed with a Cuttlebug folder,
and accented with some doodles with a Sakura glitter pen.
The checkerboard is also a piece of frayed fabric.
The snowman piece opens to reveal a photo and/or greeting.
Day 8

Taking a break with a simple, graphic card. Not too much going on here--perfect for mass-producing. I borrowed a color scheme from a card I made several years ago (Not Quite Navy, Ruby Red, More Mustard, and Old Olive). Just some punches, brads (with a smash of the hammer), and a stamped sentiment.

Well there you have it. Being caught up feels pretty good! Be back tomorrow with another one. Thanks for looking!

Saturday, April 18, 2009

Felt Bag


I wanted to make a cute little bag to hold chocolates for a hostess gift, so I sewed this one up pretty quickly. I wish I had taken photos of the process, but I wasn't sure if I would be happy with the end result.

The How-To:
  1. Cut a piece of felt. I used white felt cut to 6 1/4" x 12" to create a finished bag size of approximately 5 1/4" x 6".
  2. Cut the felt pieces that you'll embroider onto the bag. I used the Sizzix Bigz Scallop Circle and Bird with Vine dies. I cut the Bird w Vine out of brown to form the base layer, then cut it from light blue and rose to make the bird and flower layers.
  3. Trim edge of circle to desired size and pin to the white felt. Hand embroider the scallop circle to the front of the felt.
  4. Turn the felt over and fold in half right sides together. Sew sides of bag closed with 1/4 to 1/2" seam backstitching on both ends.
  5. Flip the bag right side out, and the scallop circle is neatly sandwiched in the seam to create a nice finished edge.
  6. Lightly glue the vine piece to the bag. I only ran glue on the vine and leaves where I would not be stitching.
  7. Use pins to tack the rest of the design in place and embroider with floss.
  8. Cut handles to 1" x 12" and sew with a decorative stitch to the front and back of the bag.

Voila! Hang your little bag on a bottle of wine or Godiva White Chocolate liquor (yum! Bring on the chocolate martinis!!) and fill the bag with fine chocolates.